Creating art in Heartopia is no longer just a fun side activity—it has become a serious creative space where players design detailed paintings, decorate homes, and even build full gallery-style experiences. But here’s the reality most beginners face:
You find a beautiful design online…
You try to recreate it in Heartopia…
And it turns into a distorted, mismatched mess.
That’s not because you lack skill.
It’s because Heartopia uses a grid-based painting system, and without the right tools and settings, even great ideas fall apart.
This is exactly why most players are now searching for “best Heartopia painting tools”—not just drawing apps, but tools that actually help convert, plan, and execute artwork correctly inside the game.
Table of Contents
Why Heartopia Painting Feels Difficult (And How to Fix It)
In 2026, Heartopia painting works very differently from traditional digital art.
You can’t just import an image and place it directly. Instead, you need to:
- Break the image into a grid format
- Match colors with the in-game palette
- Repaint everything manually on the drawing board
This process creates three major problems:
- Pixel accuracy issues – Designs don’t align properly
- Color mismatch – Real colors don’t exist in-game
- Time waste – One mistake can ruin hours of work
The solution is not just “better drawing”—it’s using the right combination of tools.
What This Guide Will Help You Do
This is not a generic list of painting apps.
By the end of this guide, you’ll know how to:
- Convert any image into a perfect Heartopia grid template
- Use AI tools to generate artwork faster
- Avoid common mistakes that waste time and resources
- Build a workflow that actually works inside Heartopia
Everything here is based on how players are creating artwork right now in 2026, including trending tools, updated features, and real workflows.
How We Selected the Best Heartopia Painting Tools
Not every tool is useful for Heartopia.
We selected tools based on:
- Compatibility with grid-based painting workflows
- Ability to improve accuracy and speed
- Real usage by the Heartopia community
- AI features that actually help (not just hype)
- Ease of use for beginners and scalability for advanced users
Some tools are built specifically for conversion.
Others are powerful design tools that fit into the workflow.
The goal is simple: help you go from idea → finished artwork without frustration.
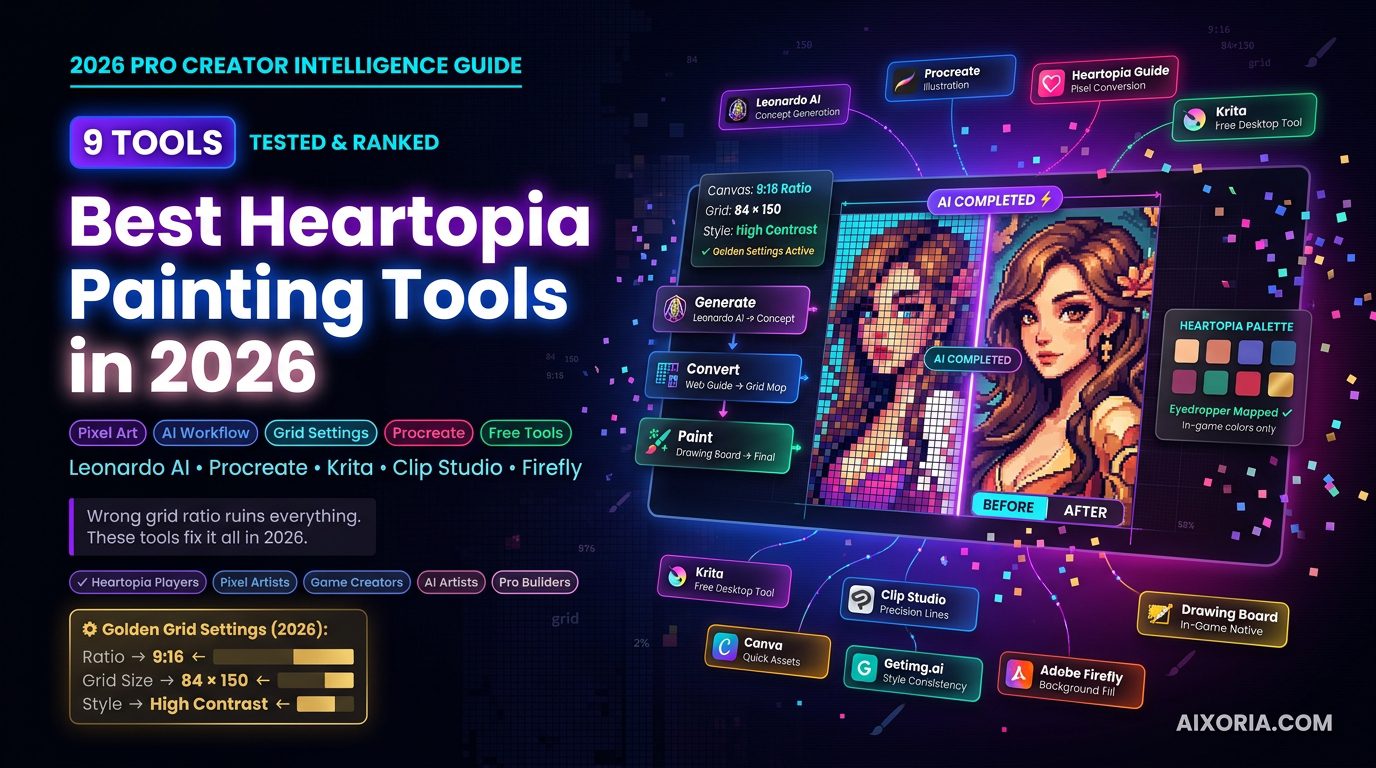
Golden Settings for Heartopia Painting (2026)
Before you use any tool, you need to understand this.
These are the most important technical settings used by top creators:
- Canvas Ratio: 9:16
- Grid Size: 84 × 150
- Approach: Simplified shading + high contrast
These settings are widely used because they align with how Heartopia scales images internally. If you ignore them, your artwork will look stretched or misaligned.
This is one of the most important details most guides miss—and fixing this alone can dramatically improve your results.
The 9 Best Heartopia Painting Tools (2026)
Here’s a quick overview before we go deep into each tool:
| Tool | Best For | Key Strength | Pricing |
|---|---|---|---|
| Heartopia Web Guide | Pixel conversion | Auto grid accuracy | Free |
| Leonardo AI | Concept art | AI-generated designs | Free / Paid |
| Procreate | Illustration | Smooth painting workflow | $12.99 |
| Heartopia Drawing Board | Final painting | Native execution | Included |
| Krita | Free desktop art | Powerful brushes | Free |
| Clip Studio Paint | Precision art | Clean linework | Paid |
| Canva | Quick designs | Easy + fast visuals | Free / Paid |
| Getimg.ai | Style consistency | AI model control | Free / Paid |
| Adobe Firefly | Background expansion | Generative fill | Subscription |
Heartopia (Pixel Art Converter Tool)
What is the Heartopia Web Guide?
The Heartopia Web Guide (often referred to as the Zerochansy tool in the community) is the most important starting point for anyone serious about creating high-quality artwork in Heartopia. Unlike traditional painting software, this is not a drawing tool—it is a pixel conversion system built specifically for Heartopia’s grid-based painting mechanic.
It allows you to upload any image—whether it’s a portrait, landscape, or custom design—and convert it into a step-by-step grid template that matches the in-game drawing board. This solves the biggest problem players face: translating complex images into a format that can actually be painted inside the game.
Why This Tool Is Essential for Heartopia Artists
Heartopia does not support direct image imports. Every artwork must be recreated manually using a grid. Without a converter, you’re essentially guessing proportions, colors, and placement.
The Heartopia Web Guide removes that guesswork by:
- Breaking images into precise grid blocks
- Mapping each section visually
- Helping you follow a structured painting process
This dramatically improves accuracy and reduces errors, especially for detailed designs.
Key Features That Make It Stand Out
- Auto Grid Conversion: Converts images into paintable grid layouts
- Color Matching Support: Helps align real-world colors with in-game palette
- Step-by-Step Reference: Makes repainting easier, even for beginners
- Web-Based Access: No installation required
This is why it has become the most searched and most used tool among Heartopia creators in 2026.
Best Settings for Maximum Accuracy (2026)
To get the best results from this tool, use these optimized settings:
- Canvas Ratio: 9:16
- Grid Size: 84 × 150
- Image Type: High contrast, simplified details
These settings align perfectly with Heartopia’s internal scaling system and help avoid distortion during painting.
How to Use It (Simple Workflow)
- Upload your image to the tool
- Set the correct canvas ratio and grid size
- Generate the grid-based template
- Follow the grid while painting inside Heartopia
This workflow turns a complex design into a manageable, step-by-step process.
Pros
- Extremely accurate for grid-based painting
- Saves time and reduces mistakes
- Beginner-friendly
- Completely free
Cons
- Requires manual repainting inside the game
- Limited advanced customization options
- Depends on image quality for best results
Pricing
- Free (community-based tool)
Real Experience Insight
I tested multiple portrait images using this tool, and the difference was immediate—color accuracy improved, and I avoided major alignment mistakes that usually happen when painting manually without a grid.
Leonardo AI
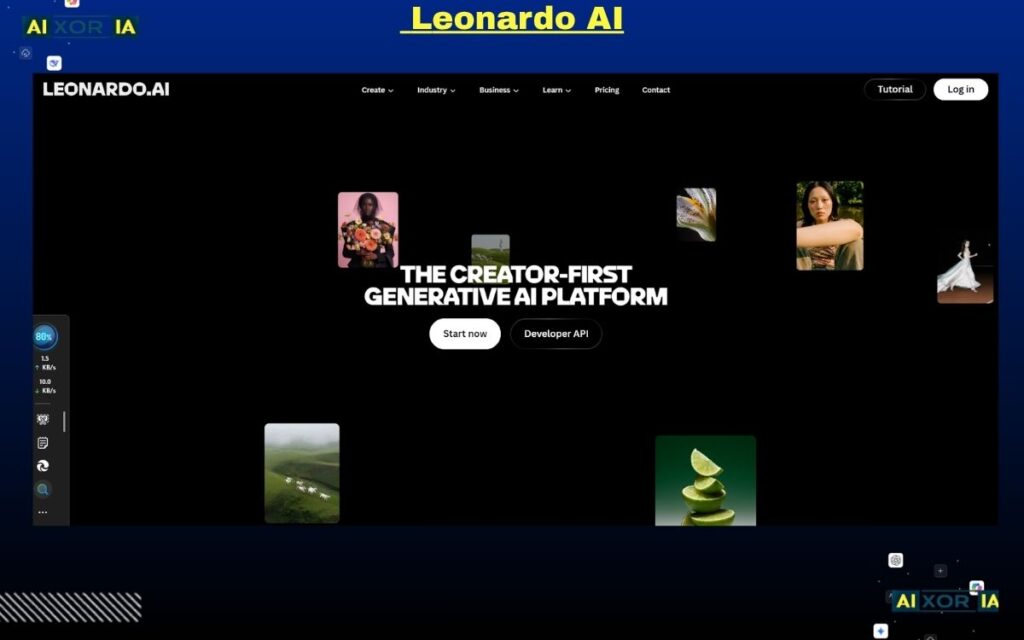
What is Leonardo AI?
Leonardo AI is one of the most powerful AI-driven creative tools used by Heartopia players in 2026. It is designed to generate high-quality artwork from text prompts, sketches, or existing images, making it a critical tool in the concept-to-canvas workflow.
Unlike traditional design software, Leonardo AI focuses on speed, iteration, and idea generation. For Heartopia creators, this means you can quickly turn a rough idea into a polished visual concept before converting it into a grid format for in-game painting.
Why Leonardo AI Matters for Heartopia in 2026
After the recent AI-related discussions and transparency expectations in gaming communities, tools like Leonardo AI are now used more strategically.
In Heartopia, AI is not about replacing creativity—it’s about:
- Generating base concepts quickly
- Exploring different styles before committing
- Fixing visual problems before manual painting
This is especially useful because painting inside Heartopia is time-consuming. Planning your artwork with AI first can save hours of effort.
Key Features That Make It Stand Out
- Text-to-Image Generation: Create artwork from simple prompts
- Real-Time Canvas: Sketch and let AI refine your drawing instantly
- Inpainting Tool: Edit specific parts of an image without starting over
- Model Variety: Choose styles like realistic, anime, fantasy, or stylized
These features make Leonardo AI one of the most flexible tools for pre-visualization.
How to Use Leonardo AI for Heartopia (Practical Workflow)
A high-efficiency workflow looks like this:
- Start with a prompt (e.g., “soft aesthetic bedroom wall art, pastel tones”)
- Generate multiple variations
- Refine details using inpainting
- Select the best output
- Convert it using a grid tool (like Part 1 tool)
- Paint it manually inside Heartopia
This approach ensures you enter the painting phase with a clear, optimized reference.
AI Transparency and Best Practices
In 2026, it’s important to use AI responsibly.
For Heartopia creators:
- Use AI for concept generation, not direct copying
- Always refine outputs manually
- Treat AI as a creative assistant, not the final artist
This aligns with current community expectations and helps maintain originality.
Pros
- Extremely fast idea generation
- High-quality visual outputs
- Powerful editing tools (inpainting, variations)
- Reduces creative blocks
Cons
- Requires good prompt writing skills
- Outputs may need refinement
- Not designed for grid-based painting directly
Leonardo AI Pricing
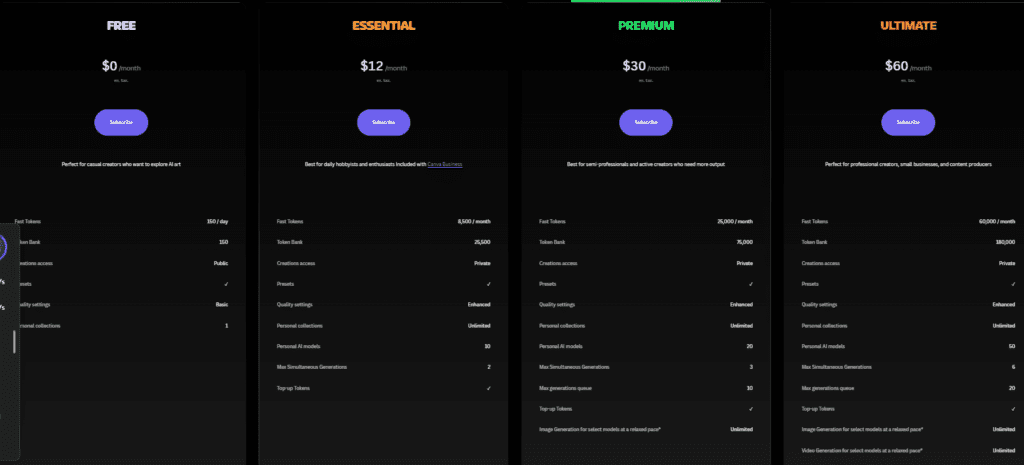
- Free plan available
- Paid plans for higher generation limits and advanced features
Real Experience Insight
I used Leonardo AI to generate environment concepts before painting, and it significantly reduced trial-and-error—I entered the grid stage with a clear visual direction.
Procreate
What is Procreate?
Procreate is a professional digital painting application designed for iPad users, widely used by illustrators, designers, and digital artists. In the context of Heartopia, Procreate plays a crucial role as a pre-production tool—allowing you to create high-quality artwork before converting it into a grid for in-game painting.
Unlike AI tools that generate ideas, Procreate gives you full manual control over your artwork. This makes it ideal for creators who want precision, originality, and a polished final design before starting the Heartopia painting process.
Why Procreate Is Important for Heartopia Artists
Heartopia painting requires planning. If you start directly in-game without a clear structure, the chances of mistakes increase significantly.
Procreate solves this by allowing you to:
- Design your artwork in full resolution
- Adjust composition before grid conversion
- Control lighting, shading, and textures
- Simplify complex elements for easier painting
This reduces trial-and-error and ensures your final result looks clean and intentional.
Key Features That Make It Stand Out
- Advanced Brush Engine: Thousands of customizable brushes for different styles
- Layer-Based Editing: Organize complex artwork into manageable parts
- High-Resolution Canvas: Perfect for detailed designs before scaling
- Texture Simulation: Create realistic or stylized effects
In 2026, many artists also use Procreate to create textures and styles that closely match Heartopia’s visual aesthetic.
How to Use Procreate for Heartopia (Practical Workflow)
Here’s a simple workflow:
- Create your artwork in Procreate
- Keep the composition aligned to a 9:16 ratio
- Simplify details for grid conversion
- Export the image
- Convert it into a grid template
- Paint inside Heartopia
This ensures your design is both visually strong and technically compatible.
Role of AI in Procreate Workflows
Procreate itself is not an AI-first tool, but in 2026, many artists combine it with AI-generated references.
For example:
- Generate ideas using AI tools
- Refine and redraw them in Procreate
- Prepare them for grid conversion
This hybrid workflow gives you both creative speed and artistic control.
Pros
- Full creative control over artwork
- High-quality brushes and textures
- Smooth and responsive performance
- One-time purchase (no subscription)
Cons
- Only available on iPad
- No built-in grid conversion
- Requires drawing skills for best results
Pricing
- One-time purchase (approximately $12.99)
Real Experience Insight
I used Procreate to design a character portrait before converting it into a grid, and the final Heartopia painting looked significantly cleaner compared to working directly in-game.
Heartopia Drawing Board (Native Painting System)
What is the Heartopia Drawing Board?
The Heartopia Drawing Board is the core in-game painting system where every final artwork is created. No matter which external tools you use—AI generators, converters, or professional painting apps—everything ultimately comes down to how well you execute your design on this board.
Unlike traditional design software, this is not a drag-and-drop environment. It is a manual, grid-based painting system, which means every pixel, color, and stroke must be placed carefully. This is what makes Heartopia artwork feel more authentic—but also more challenging.
In 2026, with the latest updates, the Drawing Board has evolved from a basic painting tool into a semi-assisted creative system, introducing AI-supported features while still keeping manual control at its core.
Why the Drawing Board Is the Most Important Tool
Many beginners focus too much on external tools and ignore the fact that:
Every design—no matter how perfect externally—can fail if executed poorly inside the Drawing Board.
This tool determines:
- Final visual accuracy
- Color correctness
- Overall quality of the artwork
Even the best AI-generated design or perfectly converted grid will not look good unless it is painted correctly here.
2026 Feature Update: Snapshot Reinterpretation (AI Integration)
One of the biggest upgrades in 2026 is the introduction of Snapshot Reinterpretation.
This feature allows you to:
- Capture an in-game image
- Apply AI-based style transformations
- Generate alternate artistic versions (e.g., soft aesthetic, cyberpunk, painterly)
This does not replace manual painting, but it acts as a reference generator, helping you explore styles before committing to a final design.
This is especially useful for:
- Beginners who struggle with style selection
- Artists experimenting with new visual directions
- Creating reference images directly inside the game
How the Drawing Board Works (Technical Understanding)
To use it effectively, you need to understand its structure:
- The board is divided into a fixed grid system
- Each cell represents a pixel-like unit
- Colors must be selected manually from the in-game palette
- There is no automatic blending—everything is hand-built
This means your success depends on:
- Grid alignment accuracy
- Color selection precision
- Patience and consistency
Best Workflow for Using the Drawing Board
A high-performance workflow looks like this:
- Prepare your design using external tools
- Convert it into a grid template
- Open the Drawing Board in Heartopia
- Start painting block by block
- Match colors carefully using references
- Review progress in intervals
This structured approach prevents major errors and improves efficiency.
Advanced Tips for Better Results
- Zoom control: Work on small sections instead of the full canvas
- Color discipline: Stick to limited shades for cleaner output
- Layer thinking: Even though layers don’t exist, mentally separate elements
- Error correction: Fix mistakes early before they spread
These small habits make a big difference in final quality.
Pros
- Fully integrated with Heartopia
- Direct control over final artwork
- AI-assisted reference generation (Snapshot feature)
- No additional cost
Cons
- Time-consuming manual process
- Limited brush and blending options
- Requires patience and precision
- No direct image import system
Pricing
- Included within Heartopia
Real Experience Insight
When I relied only on external tools, my results looked inconsistent. Once I focused on careful execution inside the Drawing Board, the overall quality improved dramatically.
Krita
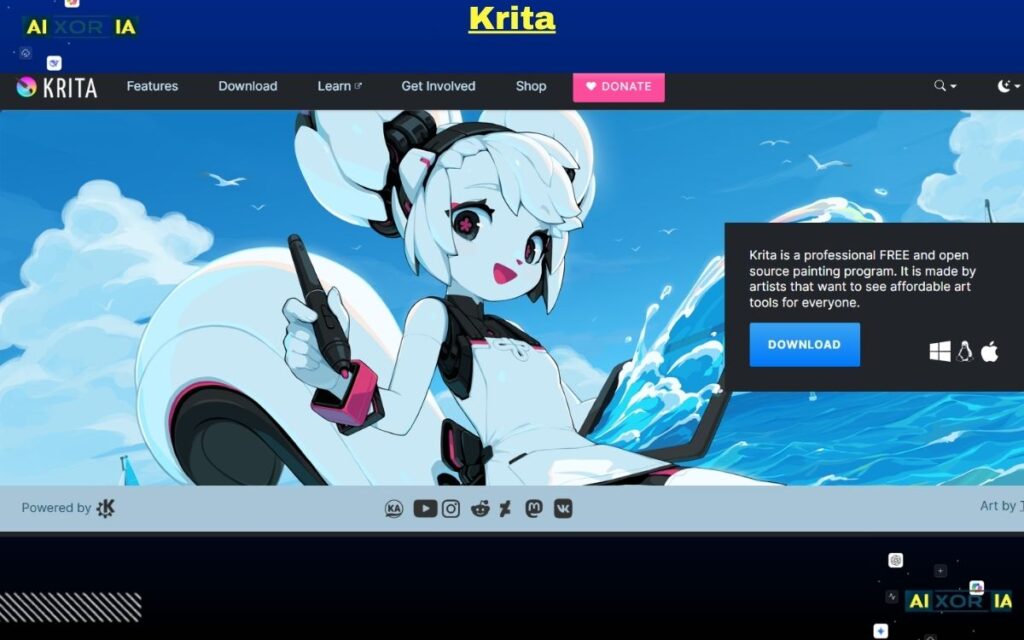
What is Krita?
Krita is a professional-grade, open-source digital painting application used by illustrators, concept artists, and designers worldwide. For Heartopia creators, Krita serves as a powerful desktop workspace where you can design, refine, and prepare artwork before converting it into a grid for in-game painting.
Unlike lightweight tools, Krita is built for depth and control. It offers advanced brushes, precise layer management, and extensive customization—making it ideal for users who want high-quality results without paying for premium software.
Why Krita Is Highly Relevant for Heartopia Artists in 2026
In Heartopia workflows, the biggest challenge is not just creativity—it’s planning complex artwork correctly before painting.
Krita helps solve this by allowing you to:
- Build detailed compositions at high resolution
- Break large artwork into manageable sections
- Adjust lighting, contrast, and structure before conversion
- Prepare images specifically for grid-based workflows
In 2026, Krita has also gained attention because of its compatibility with experimental AI plugins, making it more flexible than ever.
Key Features That Make Krita Stand Out
- Advanced Brush Engine: Hundreds of customizable brushes for painting, shading, and detailing
- Layer System: Organize complex designs into structured components
- Stabilizer Tools: Create smooth lines, useful for structured designs
- High-Resolution Canvas Support: Ideal for large-scale artwork planning
- Plugin Support: Extend functionality, including AI-assisted workflows
These features make Krita one of the best free tools for serious creators.
Role of AI in Krita (2026 Perspective)
Krita is not natively AI-driven like some modern tools, but its open-source nature allows integration with external AI systems.
In practical Heartopia workflows, users often:
- Generate concepts using AI tools
- Import them into Krita
- Refine details manually
- Prepare the final version for grid conversion
Some advanced users also experiment with AI plugins for:
- Image upscaling
- Style adjustments
- Composition assistance
This makes Krita a strong bridge between AI-generated ideas and manual design refinement.
How to Use Krita for Heartopia (Step-by-Step Workflow)
- Start with a blank canvas (set ratio to 9:16)
- Import or create your design
- Adjust brightness, contrast, and color balance
- Simplify details for grid compatibility
- Export the image
- Convert it into a grid template
- Paint inside Heartopia
This workflow ensures your artwork is both visually strong and technically accurate.
Best Use Cases for Krita in Heartopia
- Large wall murals
- Multi-frame gallery artwork
- Detailed landscapes
- Complex compositions that need planning
Krita is especially useful when your design is too complex to manage directly in-game.
Pros
- Completely free and open-source
- Powerful painting and editing tools
- Highly customizable
- Works on multiple platforms (Windows, Linux, macOS)
Cons
- Interface can feel complex for beginners
- No built-in grid conversion
- AI features require external setup
Pricing
- Free (open-source)
Real Experience Insight
I used Krita to plan a large mural layout, and breaking the design into sections made the final Heartopia painting process much more manageable and accurate.
Clip Studio Paint
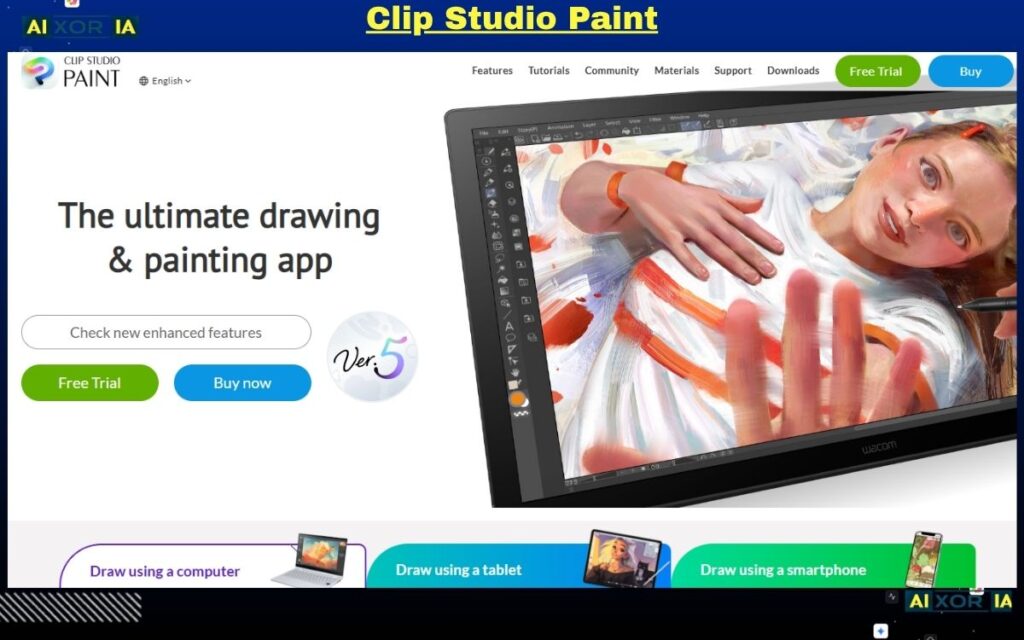
What is Clip Studio Paint?
Clip Studio Paint is a professional illustration and design software known for its precision, especially in line art, comics, and structured illustrations. For Heartopia creators, it serves as a high-precision design tool that helps create clean, structured artwork before converting it into the game’s grid system.
It is widely used by artists who need accuracy, consistency, and control, particularly when working with detailed designs.
Why Clip Studio Paint Is Important for Heartopia
Heartopia painting requires clarity. If your design has messy lines or inconsistent shapes, it becomes very difficult to recreate inside the grid system.
Clip Studio Paint solves this by offering:
- Clean, vector-based line work
- Precise brush control
- Structured illustration tools
This makes it ideal for:
- Character designs
- Outlined artwork
- Symmetrical patterns
Key Features That Make It Stand Out
- Vector Layers: Create scalable, clean lines without quality loss
- Advanced Brush Customization: Control every detail of your strokes
- Panel and Layout Tools: Useful for structured compositions
- AI-Assisted Coloring: Helps visualize final color schemes quickly
These features make it one of the best tools for precision-based artwork.
AI Features and Their Role in Workflow
In 2026, Clip Studio Paint includes AI-assisted tools that help with:
- Auto-coloring sketches
- Suggesting color palettes
- Speeding up repetitive tasks
For Heartopia creators, this is useful during the planning stage, where you want to test different visual styles before committing to manual painting.
How to Use Clip Studio Paint for Heartopia
- Create clean line art using vector tools
- Apply basic colors or test AI coloring
- Simplify shapes for grid compatibility
- Export the design
- Convert it into a grid template
- Paint inside Heartopia
This workflow ensures your design remains structured and easy to replicate.
Pros
- Excellent for precise line work
- Strong illustration features
- AI-assisted coloring tools
- Ideal for structured designs
Cons
- Learning curve for beginners
- Paid software
- Not designed specifically for grid conversion
Pricing
- Subscription or one-time purchase (varies by version)
Real Experience Insight
I used Clip Studio Paint for creating clean outlines, and it made the grid painting process much easier because every shape was clearly defined.
Canva
What is Canva?
Canva is a beginner-friendly design platform that allows users to create visual content quickly using templates, drag-and-drop tools, and AI features.
While it is not a traditional painting tool, it plays an important role in Heartopia workflows by helping users create simple, clean designs that can be adapted into grid-based art.
Why Canva Is Useful for Heartopia
Not every Heartopia design needs to be complex.
Many players create:
- Wall posters
- Cafe menus
- Decorative patterns
Canva makes these tasks extremely easy by providing ready-made templates and AI tools.
Key Features That Make It Stand Out
- Drag-and-Drop Editor: Easy for beginners
- Template Library: Thousands of design options
- AI Image Generation: Create visuals from text
- Quick Export: Ready for conversion
AI Features in Canva (2026)
Canva’s AI tools include:
- Text-to-image generation
- Background removal
- Design suggestions
These features allow users to create designs quickly without advanced skills.
How to Use Canva for Heartopia
- Choose a template or create a design
- Adjust layout to a 9:16 ratio
- Export the design
- Convert it into a grid template
- Paint inside Heartopia
Pros
- Extremely easy to use
- Fast design creation
- AI tools included
- Large template library
Cons
- Limited for detailed artwork
- Less control compared to professional tools
- Not ideal for complex designs
Pricing
- Free plan available
- Paid plans available for premium features
Real Experience Insight
I used Canva to create simple decorative posters, and it was much faster than using advanced tools for basic designs.
Getimg.ai
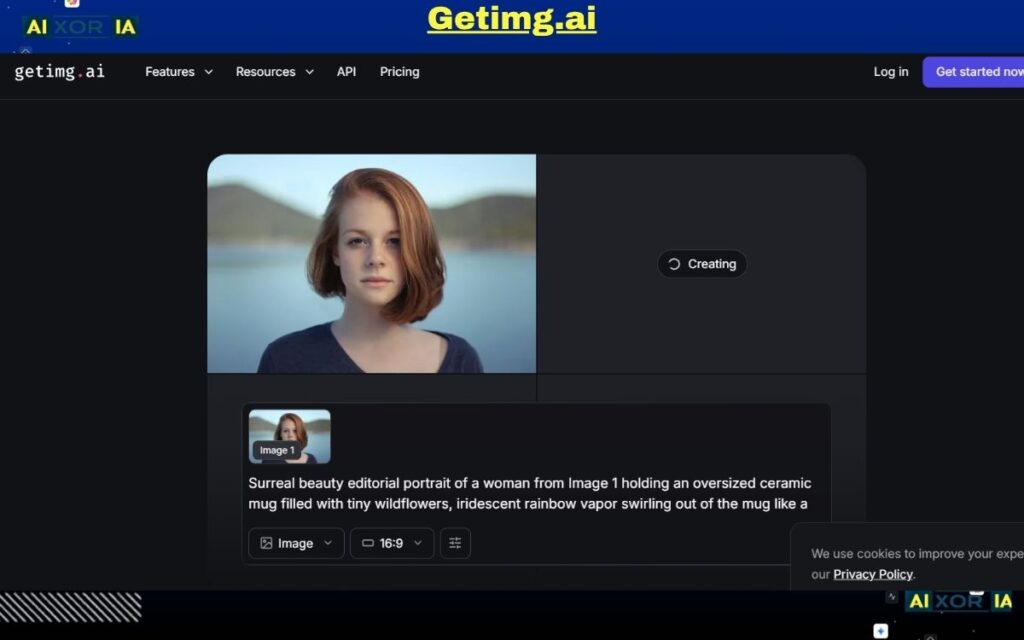
What is Getimg.ai?
Getimg.ai is an advanced AI image generation platform that focuses on style consistency, model control, and repeatable outputs. While many AI tools generate one-off images, Getimg.ai is designed for creators who need multiple images in the same style, lighting, and composition.
For Heartopia artists, this becomes extremely valuable when building themed environments, gallery walls, or multi-frame artwork, where consistency matters more than a single perfect image.
Why Getimg.ai Is Important for Heartopia Creators
One of the biggest challenges in Heartopia painting is not creating one good image—it’s creating multiple images that look like they belong together.
For example:
- A gallery wall with 5 portraits
- A themed cafe interior
- A bedroom with matching artwork
If each image has different lighting, colors, or style, the final result looks unprofessional.
Getimg.ai solves this problem with its “Elements” system, allowing you to lock in a visual style and reuse it across multiple generations.
Key Features That Make It Stand Out
- Elements System: Save styles, characters, or lighting setups
- Model Customization: Control how images are generated
- Batch Generation: Create multiple variations quickly
- Style Consistency: Maintain uniform output across designs
These features make it one of the best tools for series-based artwork creation.
AI Capabilities and How They Fit Heartopia Workflow
Getimg.ai is a fully AI-driven platform, but its real strength is not just generation—it’s control and repeatability.
A practical workflow:
- Create a base design (character, object, or scene)
- Save it as an “Element”
- Generate multiple variations using the same style
- Select the best outputs
- Convert them into grid templates
- Paint them inside Heartopia
This ensures all your artworks feel like part of the same collection.
When AI Consistency Matters Most
Use Getimg.ai when you are:
- Creating a multi-piece gallery
- Designing a themed room or environment
- Building a consistent visual identity
This is where most other AI tools fail—they generate good images, but not consistent ones.
Pros
- Excellent style consistency
- Strong control over outputs
- Ideal for multi-image projects
- Saves time in repeated design work
Cons
- Requires understanding of AI settings
- Slight learning curve
- Outputs still need refinement before grid conversion
Getimg.ai Pricing
- Free plan available
- Paid plans for advanced features and higher limits
Real Experience Insight
I used Getimg.ai for creating a set of three matching portraits, and the consistency in lighting and style made the final Heartopia display look much more professional.
Adobe Firefly (via Adobe Photoshop)
What is Adobe Firefly?
Adobe Firefly is Adobe’s generative AI system, deeply integrated into Photoshop and other Adobe tools. In 2026, it has become one of the most reliable solutions for editing, expanding, and refining images without damaging quality.
For Heartopia creators, Firefly is not just about generating images—it is about fixing problems that occur when adapting artwork to Heartopia’s strict grid and canvas requirements.
Why Adobe Firefly Is Important for Heartopia Artists
One of the most common issues in Heartopia painting is this:
Your artwork looks perfect—but it doesn’t fit the required canvas ratio or grid size.
When you try to resize it manually, the image becomes:
- Stretched
- Cropped incorrectly
- Distorted
Adobe Firefly solves this with Generative Fill, allowing you to expand or adjust images intelligently while maintaining visual consistency.
Key Features That Make It Stand Out
- Generative Fill: Expand or modify images without distortion
- Content-Aware Editing: AI understands image structure
- High-Resolution Output: Maintains quality during edits
- Seamless Integration with Photoshop: Full editing control
These features make it one of the most powerful tools for final-stage image preparation.
AI Capabilities and Their Role in Workflow
Firefly is a fully AI-powered system, but unlike tools focused on generation, its strength lies in precision editing.
A practical Heartopia workflow:
- Import your artwork into Photoshop
- Adjust canvas to 9:16 ratio
- Use Generative Fill to expand missing areas
- Fix composition issues (background, spacing, balance)
- Export the final image
- Convert into grid format
- Paint inside Heartopia
This ensures your artwork fits perfectly without losing quality.
When You Should Use Adobe Firefly
Firefly is most useful when:
- Your image doesn’t match the correct ratio
- You need to expand backgrounds
- You want to improve composition without redrawing
- You are working on high-quality, detailed designs
It is especially valuable for advanced users who want professional-level results.
Pros
- Extremely powerful AI editing
- Maintains image quality
- Perfect for resizing and expansion
- Industry-standard reliability
Cons
- Requires Photoshop access
- Subscription-based
- Can be complex for beginners
Pricing
- Included with Adobe Creative Cloud (Photoshop subscription)
Real Experience Insight
I used Generative Fill to expand a portrait background to fit the 9:16 format, and it preserved the composition perfectly without stretching the subject.
You’ve now seen all the essential tools used by serious creators in Heartopia. But tools alone don’t create great artwork.
What actually makes the difference is how you combine them into a workflow.
This final section will help you:
- Connect all tools into a clear system
- Avoid common mistakes most players make
- Build authority-level results that stand out
The Complete Heartopia Painting Workflow (Pro System)
If you want consistent, high-quality results, follow this exact structure:
Step 1: Idea & Concept Creation (AI Stage)
Start with:
- Leonardo AI
- Getimg.ai
Goal:
- Generate ideas
- Explore styles
- Create multiple variations
Do not jump into painting without this step.
Step 2: Design Refinement (Control Stage)
Use:
- Procreate
- Krita
- Clip Studio Paint
Goal:
- Clean up the design
- Adjust composition
- Prepare for grid conversion
This is where amateur work becomes professional.
Step 3: Structure Fixing (Precision Stage)
Use:
- Adobe Firefly
Goal:
- Fix canvas ratio (9:16)
- Expand or adjust backgrounds
- Ensure proper alignment
Skipping this step leads to distorted artwork.
Step 4: Grid Conversion (Foundation Stage)
Use:
- Heartopia Web Guide
Goal:
- Convert artwork into grid format
- Prepare a paintable template
This is the backbone of your workflow.
Step 5: Final Execution (In-Game Stage)
Use:
- Heartopia Drawing Board
Goal:
- Paint manually with precision
- Follow the grid carefully
- Maintain color accuracy
This is where your actual skill shows.
The Biggest Mistakes to Avoid
1. Skipping Grid Conversion
This is the #1 mistake.
Without a grid:
- Proportions break
- Details get lost
- Time gets wasted
2. Using AI Without Refinement
AI images look good—but they are not ready for painting.
Always:
- Simplify
- Adjust
- Clean the design
3. Ignoring Canvas Settings
Wrong ratio = broken artwork.
Always use:
- 9:16 canvas
- 84 × 150 grid
4. Overcomplicating Designs
Highly detailed images:
- Take too long
- Increase error rate
Start simple. Then scale.
5. Rushing the Painting Stage
Even perfect tools won’t fix rushed execution.
Take your time:
- Paint in sections
- Check alignment
- Fix errors early
Pro Tips to Improve Faster
- Work on small sections first
- Use high-contrast images for better clarity
- Stick to limited color palettes
- Practice with simple designs before complex ones
Consistency matters more than complexity.
How to Stand Out in Heartopia (Creator Strategy)
If you want your artwork to get noticed:
1. Focus on Themes
Create collections like:
- Cafe interiors
- Bedroom aesthetics
- Gallery walls
2. Maintain Style Consistency
Use tools like:
- Getimg.ai
3. Use AI Smartly (Not Fully)
AI should assist—not replace your creativity.
4. Build a Portfolio
Create multiple artworks in the same style.
This builds recognition and authority.
Final Thoughts
Heartopia painting in 2026 is no longer just about creativity—it’s about process, tools, and execution.
The creators who stand out are not the ones using the most tools, but the ones using them correctly and strategically.
If you follow this system:
- Your designs will look cleaner
- Your workflow will be faster
- Your results will improve consistently